As part of building Cone Down, one of our features was making the dancefloor interactive. We went with pressure sensitivity, built a prototype, but ran into 2 snags that stopped us:
- We ran out of time (e.g. assembly, debugging)
- Dancefloor cover (polycarbonate sheet) warped under heat (discovered at Burning Man) thus further iteration became implausible at the event
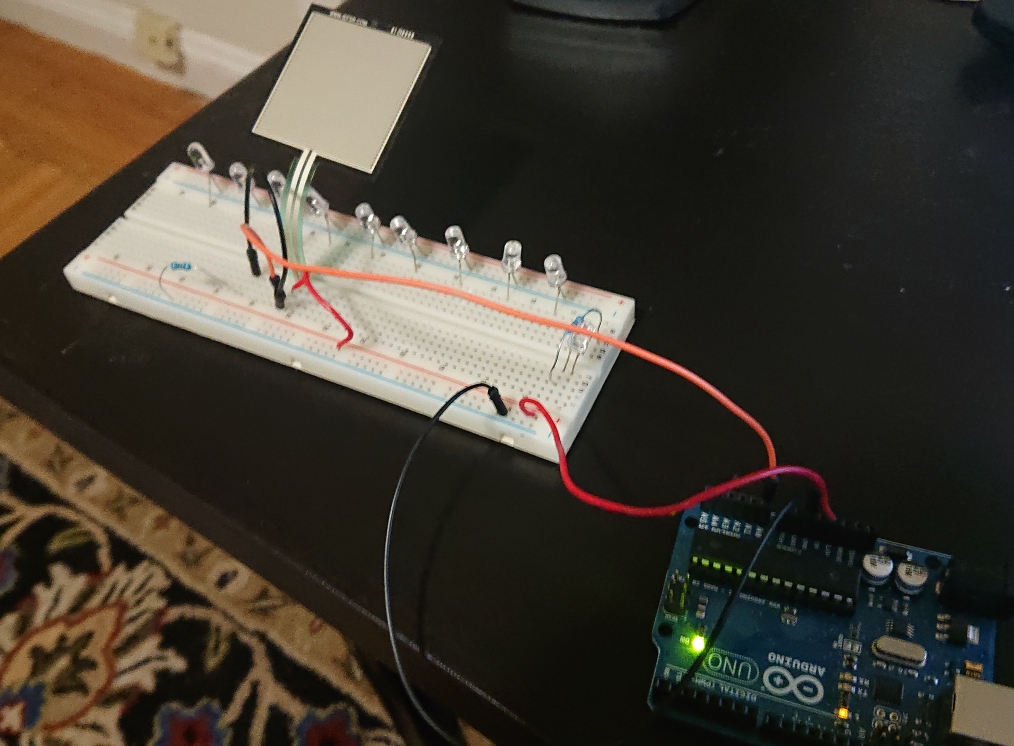
Here's the final functional setup we used for our top-of-frame prototype (polycarbonate unmounted in photo):


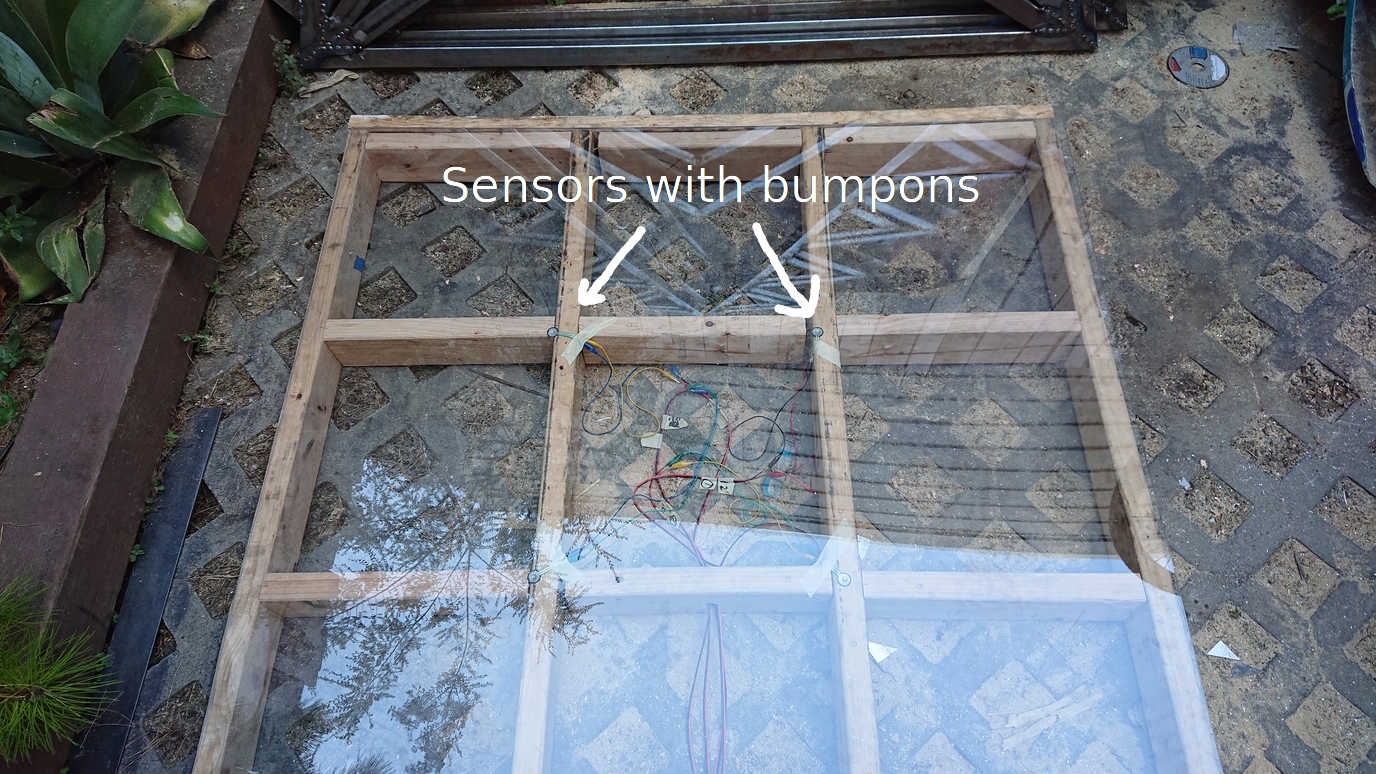
This is a layout for 1 of the 9 tiles dancefloor. Inside of each tile is a small 3x3 grid for supporting polycarbonate which can be bendy
The 4 sensors in place will detect the "+" sign shape for the dancefloor tile. We settled on this approach as it's much more economical than the full square which requires double the cost
Each sensor was a force sensitive resistor using a secondary static resistor to create a voltage divider circuit. Surprisingly similar to this:
https://learn.sparkfun.com/tutorials/force-sensitive-resistor-hookup-guide#example-hardware-hookup
For pressure detection/keeping the sensors in place, each sensor had a mounting tape square underneath and we used bumpons to distribute the load from the weight of the polycarbonate
Items used:
- Polycarbonate: 1/4" from TAP Plastics
- Sensors: Force sensitive resistor
- Mounting tape: https://www.amazon.com/Scotch-Indoor-Mounting-38-yards-110-MR/dp/B0015ZXEKC/
- The mounting tape served double duty for keeping the polycarbonate in place
- We'd recommend experimenting with a barrier between the mounting tape and the frame (e.g. double-sided tape) as we destroyed sensors while attempting to remove the tape
- Bumpons: https://www.amazon.com/gp/product/B000NG3Z0S/
- Arduino MEGA: https://store.arduino.cc/usa/mega-2560-r3
- This ran Firmata to sample each sensor directly from our fork of LXStudio
- Due to the high number of sensors, we wanted to keep wiring as simple as possible (e.g. no additional instructions to use a shift register or multiplexer)
Here's a high level rundown of our process:
- Considered many types of sensors sold by Adafruit and SparkFun (e.g. light, sound, pressure, flex)
- Went with force sensitive resistor as it:
- Doesn't break under heavy weights (e.g. accidental art car on platform)
- Won't have light/sound transmission issues
- Easy to wire up (only need power and ground)
- In hindsight, we should have explored flat switch membranes but we had too little time when the suggestion came up
- Set up test with Arduino, force sensitive resistors (FSR), and 50' of 22AWG cable round trip (not in setup/photo yet) (dancefloor was 12'x12', thus at most 24' there and 24' back)
- Iterated with FSR on small wooden box
- Using FSR taped down didn't work
- Added charger cord on top of FSR to test focused pressure, this worked
- Key is to have material which deforms earlier than polycarbonate
- On a later date, we formalized this to a bumpon and verified it works once again

- Made large scale prototype for 1 dancefloor tile
- Sensors didn't stay in place with tape, also broke easily
- Added mounting tape to bottom of sensors, worked great
- Got lots of false positives due to mounting tape oversticking polycarbonate at times
- Explored a few configurations (e.g. corners of tile, bumpons next to sensors, caulked down polycarbonate)
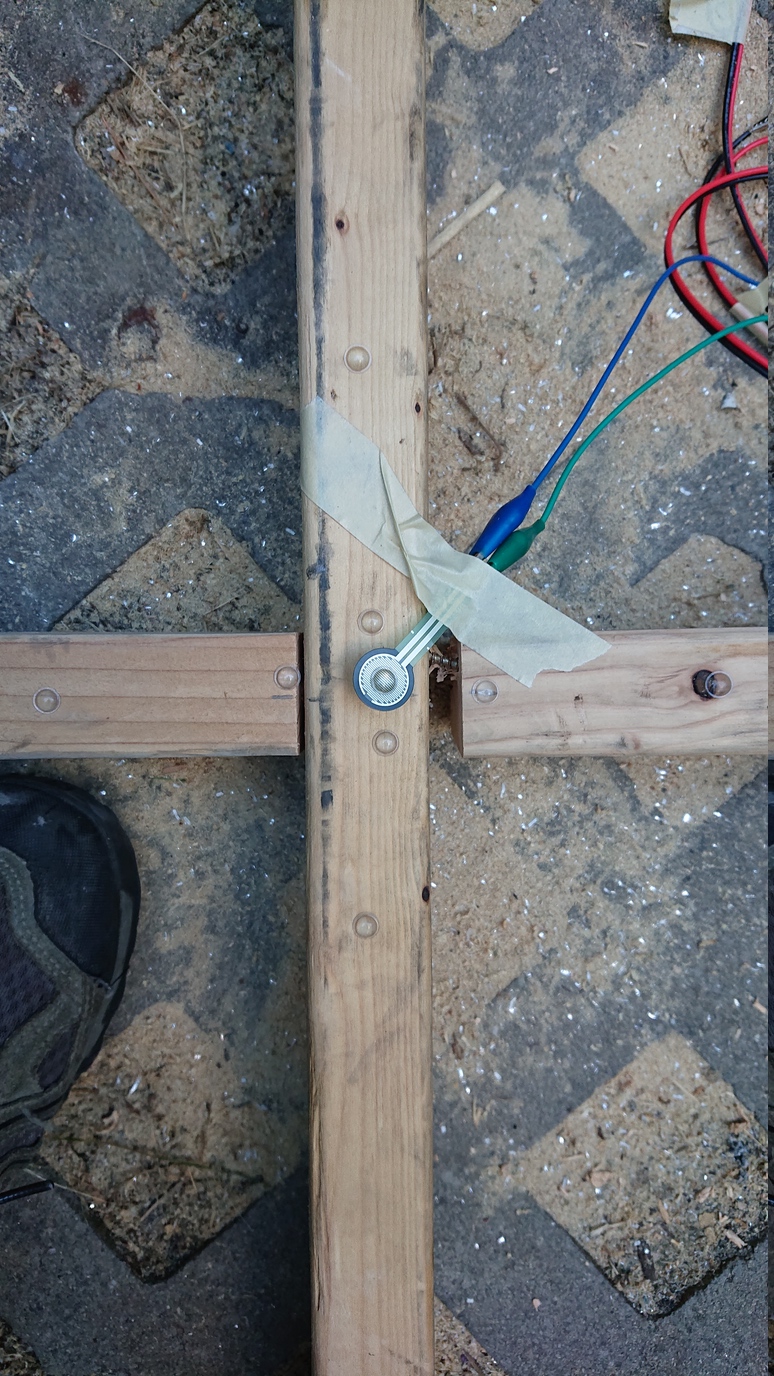
- Concluded that ideal setup is: sensors on edges of inner 3x3 with bumpons next to sensors
- Started building cables and bought full sensor order for on-playa installation but ran out of time